Showing posts with label Fall/Halloween. Show all posts

Thursday, October 14, 2010

Spooky in the house

IMG_0866Well, it’s about time for some Halloween decorating up in here!

At least that’s what the Bub said – without the “up in here” lingo. OH my goodness – he is SO exited about Halloween this year! He’s been decorating all over the place. Which in his way is pulling everything out of the bins and lining it up along every. single. surface. in the house.

Adorable. :)

It feels like I just put the fall mantel together yesterday – I never know how to do the whole fall/Halloween decor. I usually pull fall out, then do Halloween, then put fall back out on November 1. Seems like so much extra work, so next year I think I’ll just start with Halloween. Decor is so confusing.

Our spooky mantel hasn’t changed much from last year when I ended up taking a few Goodwill frames:

And spray painted them black, then filled them with various graphics I printed out:

This year I added some height by adding my $3.50 (originally $20!) sparkly haunted house to the middle:

It’s stacked up on box you can’t see. Sneaky, I am.

Do you see the adorable addition Stink Eye Sis added?:

UGH! I could DIE from the cuteness!!

Then I just continued to layer the frames:

I showed you how I made these cutie little spooky votives here:

   IMG_0834 IMG_0842

I absolutely love those little eyes. ;) I used my LED candles again – you can find them just about anywhere now!

They’re all nestled in black tulle and a string of lights. Just wish they made black Christmas tree lights, but I don’t see that happening anytime soon.

Would it be wrong if I spray painted the white cord black? Nah…even that’s a little much for me.

Maybe.

The glass jar is filled with some netting and a glittery skull – both from the Dollar Tree:

The sparkly spiders were from Pier 1 – I think eight for $1.50? Ewww…they are so grody.  But cool.

And of course, the crows are from the Dollar Tree too. That place rocks!

For a little finishing touch, I cut out some bats with my Silhouette and placed them here and there:

     IMG_0870

My friend Jen did it on her mantel and I just had to copy it. How fun is that?

It’s got a lot more going on than I would usually do – but Halloween is the one time of year I’m OK with that. And it’s only up for two more weeks anyway – when the fall decor comes back out. Gah! (At least I didn’t say Christmas decor – wink wink.)

I’m also working on our foyer as well – it started with a little friend on the mirror:

He’s just a cut out made of the vinyl texture stuff for windows. ;) I’ll show you the foyer when the Bub’s I’m done decorating it. ;)

** I’m linking this up to Beth’s Halloween mantel party –- uhhhh…my mantel is child’s play compared to some of these. Gorgeous!!

Thanks to this week’s sponsor!:

forloveorfunnybutton125

Sunday, October 10, 2010

Our (tiny!) fall porch

We have what is probably the teeniest porch EVER. We didn’t even think about it when we picked out this house though – we loved the exterior so much. It’s another one of those things you realize later…it would be nice to have a porch to sit and rock on. And maybe to decorate.  :)

But I have found ways to make it work for each season, and fall and Christmas are of course, my favorites. It’s these times of year that I quite love our little porch, because little changes make a BIG impact.

I showed you my Dollar Tree wreath a few weeks ago:

Not many of you believed our door really isn’t blue – it just photographs that way close up. ;)

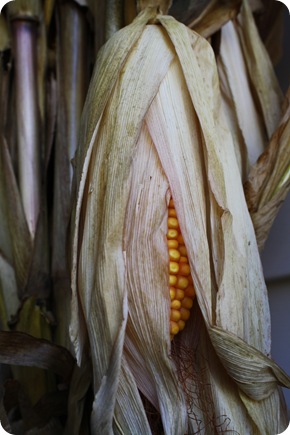
My tried and true addition to the porch are my corn husks:

corn husks

I mean really – you couldn’t get more fall than these!! I get bunches of them at a local nursery and I’ve seen them sold for $5.50 to $7 a bunch. (At least around here, where the corn isn’t hard to come by!)

On a recent True Value trip, I about squealed when I saw the HUGE mums they had:

They were only $5 EACH! I could not believe it! Plants this big are at least $15, usually more.

They are just about to burst open – any day now!

One of the items I took from my father-in-law’s house was his American flag:

He immigrated to this country 60 years ago and became a U.S. citizen. I’ve always been so proud of him for that, and he was so proud to be an American.

The beautiful new flag was the perfect finishing touch for our fall porch:

Oh, and the pumpkins from our weekend trip to the patch don’t hurt! I absolutely fell. in. love. with the green pumpkins. :)

I usually plant mums in the window boxes, but this year I was taken with the kale:

We’ve gotten SO little rain over the past few months, so these beauties should hold up well. I stuck some (fake!) pumpkins in with them, and I absolutely love how full and pretty they are!

And a cutie patootie peeking out sure helps too:

OH, be still my heart. :)

Our itty bitty porch is so easy to make over for the holidays – just a few additions make a HUGE difference:

Just in time to string the purple and orange Halloween lights everywhere!

And speaking of Halloween -- no worries, I move everything off the steps and porch that night, so there’s plenty of room for the kiddies. :)

So, do you decorate your porch for fall? Do you have an itty bitty porch like ours, or a big one? If you tell me you have a porch swing, I’m officially, totally jealous. :)


Thank you to this week’s sponsor!:

Tuesday, October 5, 2010

Falling up the stairs

Last year, I was itchin’ to tackle a certain project for MONTHS. In fact, I researched it for quite some time – and in January I finally got up the courage and went after it…and I’m SO glad I did. :)

That project was ripping the carpet off of our stairs and staining/painting the wood underneath. Hands down my favorite transformation in our house. Because we were lucky and had beautiful treads under that carpet, the whole project only cost $30 – the investment (like usual) was in my blood and sweat:

Like I said, I had been dreaming about the wood stairs for quite a while. So long that I bought the Martha Stewart mice silhouettes on clearance last fall, knowing I would use them on the steps someday. I was SO excited to pull them out of the fall stash this year! Yippeeee!

I knew I wanted to add a little somethin’ extra along with the little mice, so I used some random magazine photos as inspiration and decided to do an arrangement of itty bitty pumpkins along the side of the steps:

Because I’ve spent so little on fall decor this year, I splurged on real pumpkins. For a little extra PADOW, I added a little votive holder to each step as well:

Don’t worry – there’s no flame. :) I only use the LED votives anymore, and these are two for a buck at Dollar Tree. LOVE THEM. They even have the little flicker and look so real.

Do you see how the pie pumpkins are positively glowing? I used Stephanie Lynn’s technique for preserving pumpkins (petroleum jelly) and they are GORG!!

The Bub and I arranged our mice here and there along the risers and let. me. tell. you. – they are stinking CUTE!!:

IMG_0577

This is the only time of year I can stand spiders and mice. :)

A couple of months ago, I showed you how I finished off the stair redo by adding the detail along the side of the staircase using mdf:

After that post, my friend Layla, being the brilliant mind that she is, (a brilliant mind with Photoshop), sent me a picture with a potential change to the staircase – one I was considering for awhile, so it was AWESOME to see how it would look:

It was subtle – just changing the color of the railing. She also changed the brass fixtures to a brushed nickel, which looked so sharp!

It totally pays to have friends with Photoshop. :)

I’ve been meaning to make this little change since, but it was only when I starting falling up the stairs that I decided to just do it already, and I’m SO glad I did!!:

I sprayed the hardware in oil rubbed bronze, to work with the rest of the house. (I just took them off, sprayed with primer, then the ORB.)

The handrail got a quick sanding, then two coats of brown paint, leftover from our dining room walls. I put a coat of poly on top and plan to add one more.

I don’t know what took me so long to make the change – the dark color looks fantastic!:

A reminder of how it looked before, with the white rail:

Notice the difference in the picture quality too? ;) I LOVE my new camera!!

Pretty crazy how the color matches exactly what Layla suggested too!:

The pumpkins fit perfectly into that space under the handrail – we haven’t had any issues with them in the way at all. Now let’s just hope they hang in there a couple more months, when the Christmas decor will come out. (OH the possibilities!!)

I love how our staircase has turned into another space I get to decorate! :) Martha Stewart mice

Tired of seeing my stairs yet? (Don’t answer that.)

Adorable. I big fat love ya Martha.

Especially at half off.  :)

**Be sure to check out all of the inspiration at the Before and After Party!

**I got my mice from Michaels, but here’s a link on how to do them on your own!

(Adding this to Susan’s Met Monday!)

Thank you to this week’s sponsor!:

deeply fab 125 px sq ad

Tuesday, September 28, 2010

A fall mantel

Hello there! Well, the bins of fall decor have finally been pulled up the stairs, and I’m a little shocked at how much beady/leafy/pine coney stuff I’ve accumulated over the years.

I mean, I lurve me some beady stuff, but it’s a little much. :)

I set to work on the family room mantel today and started out putting it together like years past, but quickly realized I quite liked the way I had it decorated already…so I just decided to make some fallish changes and I LOVE it!

I especially love that it only took about 20 minutes and stuff I already had.

I started with some long, branchy, beady thangs I found deep in a storage bin…I don’t even remember buying them. :) I love finding surprises from the previous year! How fun is that?

I piled four of them up across the front of the mantel and fluffed. And fluffed. And fluffed some more:

beady stuff

I love that their twisted branches look so real.

Well, as real as branches with squishy foam beads can look:

:)

Instead of adding a ton of candles across the mantel like I’ve done in the past, I just changed out the cream candles for some in warmer tones:

The warm, fall-inspired candlesticks work perfectly!

I filled the cloche with some fall fillers, but when I stood back, it was looking a bit too busy. So I grabbed a candle stand, perched a twiggy pumpkin on top, and tied a ribbon around the base instead:

I love how the pumpkin ties in the texture of the large rattan platter in the back -- that platter stays up there throughout almost every season because it’s so honkin’ big and fills up the space perfectly.

I was determined to use what I have, and I realized this week I had PLENTY to use. ;)

I’m really pleased with how it turned out!:

fall mantel

I’m not sure where I got the beady stuff last year, but I’m willing to bet it was Hobby Lobby. I’m obsessed with the Hob Lob. The huge gourd was from Michael’s last month – I think $10? The twig pumpkin was a Goodwill find this summer ($1.99!) and the cream ceramic candle stand is from Target (they still have them in the Smith and Hawken section.)

I’ve mentioned before this corner mantel has been a thorn in my decorating side – it’s much deeper than a normal one and not nearly as wide. It’s a bit challenging to make it work, but I think I’m starting to get the hang of it.

It only took six years. :)

I love that I’m able to layer decor a bit more with a mantel like this:

Of course, I especially love it at night…lit candles make just about anything look lovely!:

There you have it! My fall mantel –- using what was already there, amped up with fall colors and fluffy beady stuff. You can’t go wrong with beady, seriously.

Have you started fall decorating? Are you feelin’ it yet? Just as I start to get in the fall mood…it’s supposed to get in the 80’s here again this week.

GAH!! Bring on October!! :) (I’ll be putting up the Halloween mantel before I know it!)

**I’m linking this up to Nester’s mantel party and Julia’s fall decorating party!

Sunday, September 26, 2010

Rewind: Warm fall glow

fall glow

Can you believe I am just now really starting to decorate for fall? Most of you probably think I’m right on time, but this is about a month late for me. ;) My recent aversion to stuff has made me cringe at the thought of pulling the bins upstairs.

But this weekend I finally got the bug, and it’s coming out slowly but surely. It’ll just be a tad simpler this year.

Last year I showed you how to take some of your most basic decor and make your home glow with the fall season – this is a repost for anyone that wasn’t around these parts a year ago.  ;)

Funny how pretty much every space in the photos below has completely changed since then. Don’t get too confused. :)

Enjoy! (Some updated pics will follow.)

------------------------------------------------------------------------

When it comes to decorating for fall, there are three things you need for a fabulous result: different textures, layering of the textures and it's gotta smell gooooood! You can't go wrong if you incorporate all of these.

I like to take items I already have and change them up for fall. For this display, I used a tray (Southern Living at Home, I love you!) I already had: I had the two larger candleholders, and purchased the three smaller ones for $1.50 each at Hobby Lobby. I placed them so the sizes were layered, and and filled in between with my go-to fall filler:

I got this stuff at Z Gallerie a couple years ago and it's still my favorite filler for this time of year. It's got glitz, it's got natural, it's got warm. Awesome.
 
I fluffed it all just so and added my candles -- the large ones were $5 from HomeGoods, the smaller were $3.50 at Hobby Lobby:
It took all of five minutes to do. I bet you have items laying around you could use too!
I wish they had scratch and sniff computers. The scent of cinnamon and apples is wafting through our house.
 
This is my view while I blog tonight:
Loverly. Have I mentioned yet how very much I ADORE fall? Just in case I haven't, I. ADORE. fall.
 
Our family room mantel has been warmed up as well. Last year I found some scrap wood, stained it and it serves as the perch for simple red and brown candles:
You'll soon realize I am a bit obsessed with these beady things. I think they are GORG. You can find them at Michael's. (I always get them on sale, they are $7 each before the discount.) I weave them through the candles for texture:
And wrapped them around the candles in the hurricanes for more texture and layering:
Yum. I could just eat it, it's just delicious. Well, not really, but you know what I'm sayin':
Delish.
 
These candleholders are so fun to fill during the holidays. Funny how I can't figure out what to put in these things most of the year, but from now until early January, I'm golden:
I fill the bottom of each with leaves in different shades of orange and red:
I get my leaves by finding garland I like, then snipping off the leaves. This is much cheaper than buying packages of leaves.
 
I add my candles and then my "scatter" -- I love this stuff! This I found at Pier 1 years ago, and I think they still carry something similar:
Autumn-inspired ribbon is tied around and fluffed just a bit for a final touch. Sigh. :)
 
In the kitchen, I used another Southern Living piece and a clearanced plate from Pier 1:
I wrapped the candle with more foamy beady things (I used double stick tape on the back to secure them). Again, layering and texturing (word?):

Oh yeah, and a yummy candle. Glorious!

Try taking items you already have -- add a candle and then some texture -- whether it be pumpkins, acorns, apples, leaves, whatever! (Just make sure they aren't near the flame! Yikes.) Have I mentioned how much I love... ummm... OK, I'll shut it. I'm off to eat a caramel apple covered in peanuts, that should shut me up.

-------------------------------------------------------------------------------

OK, totally weird, cause I’m about to eat a caramel apple again…right now. :)

I still haven’t touched the mantel or most of the other decor I mentioned in this post last year, but the tray with candles took less than five minutes to throw together on our new old Craigslist dresser:

IMG_0259

I used the two big chunky candles from the mantel last year in the bigger glass candleholders and I love how beefy they are:

IMG_0265 Because I used what I had, this little display cost me zero buckaroos, and I love it:IMG_0281

Take any kind of tray, (check out Goodwill if you don’t have one!), some candles and any kind of filler and you’ll have a beautiful fall glow for your home! Lurve…

TopOfBlogs Gardening & Landscaping (Home & Hobbies) - TOP.ORG
Yahoo bot last visit powered by  Ybotvisit.com

keyword finder